- Chapter 1: Introduction
- Chapter 2: Register company for ePost
- Chapter 3: Verify company
- Chapter 4: Activate digital letterbox
- Chapter 5: Activate ePost Scanning Service
- Chapter 6: Activate ePost SmartSend
- Chapter 7: Set up eBill via SmartSend
- Chapter 8: How to send Digital letters with ePost SmartSend
- Chapter 9: Activate ePost eArchive
Step 1: To register your company for ePost, open the following link: app.epost.ch
If you already have a SwissID, you can log in to ePost with your SwissID and register your company for ePost. As an alternative to SwissID, you can also log in with your ePost account.

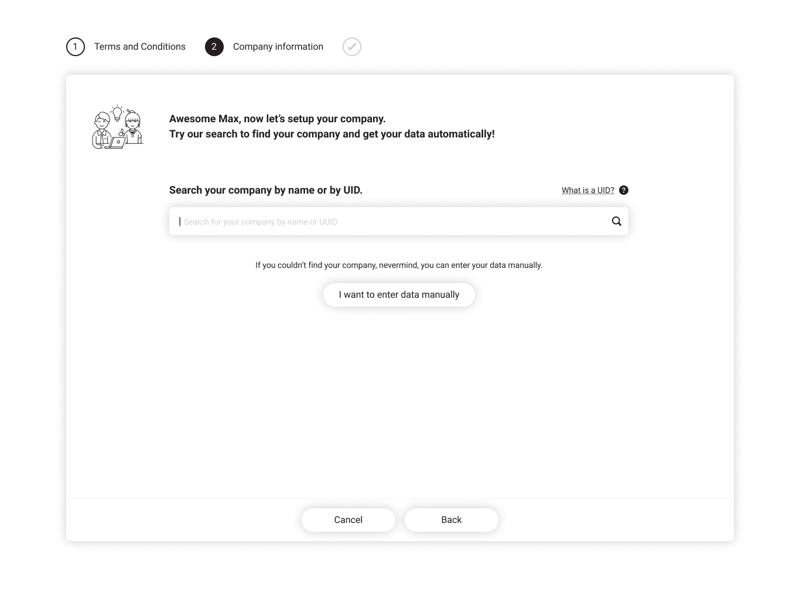
Step 2: After verifying your email address, you can register at https://app.epost.ch/, open your company and follow the registration steps.
If your company does not have a UID number, you can also open your company without a UID number under “I would like to enter my data manually”.
Your company is verified in levels-of-trust stages so that postal secrecy is also maintained in the digital world.
You can order the verification code in the ePost application as follows (button “Verify your address”):

The code will be sent to you by letter post to the registered company address.
It may take a few days for the code to reach you. Please do not order a new code until you have received the letter.
With the “digital letterbox” widget, you can receive digital mail from various senders who work with Swiss Post and ePost. This includes health insurance companies, insurance companies, banks and government bodies. You will find further information under the following article:
ePost support - digital letterbox
Step 1: Register company for ePost
Step 2: Verify address
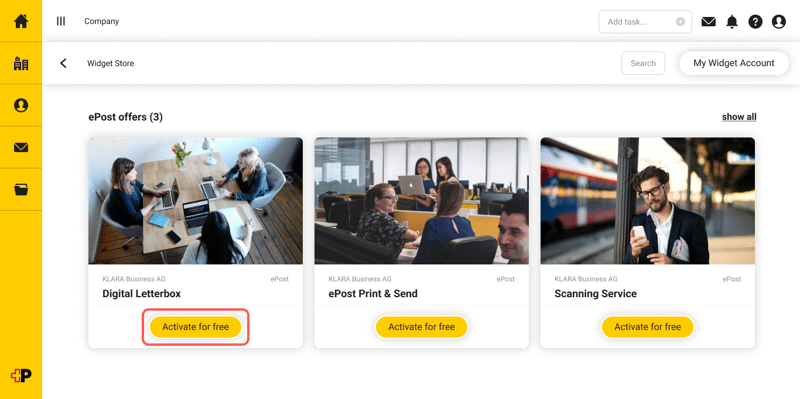
Step 3: Activate the “digital letterbox” widget:
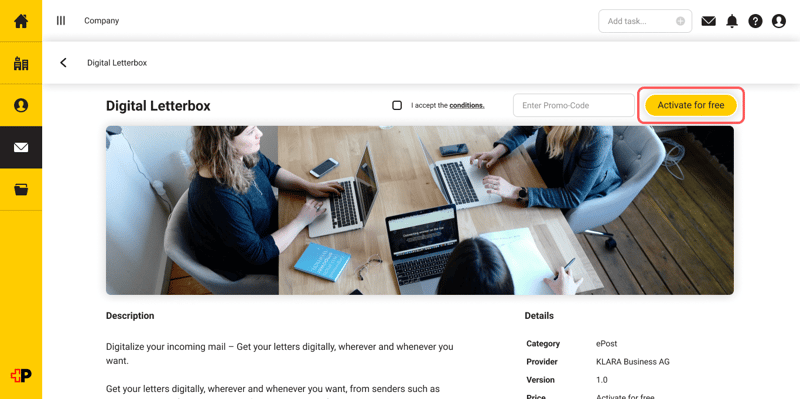
Step 4: In the digital mailbox settings you will find “Mail activation”, which has to be initialised to receive digital mail. You can also set up an e-mail notification there so that you do not miss any mail.

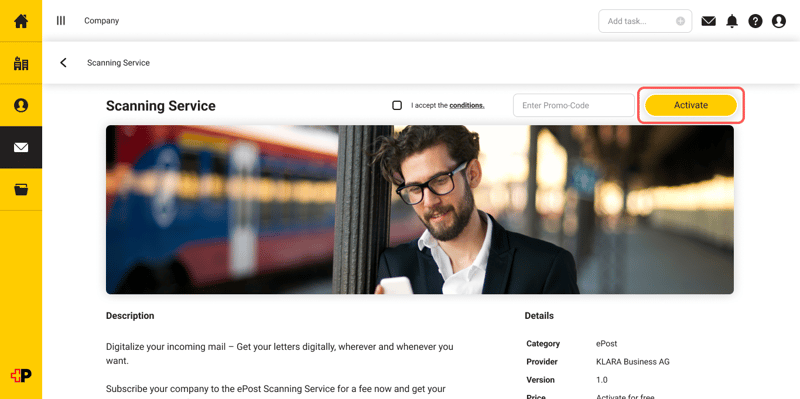
With the scanning service from ePost you have the option of receiving your letter post digitally too.
Step 1: Register company in ePost
Step 2: Verify company
Step 3: Activate the “digital letterbox” widget free of charge
Step 4: Activate “scanning service” widget:
After 3-4 working days, you should receive your first digital letters at app.epost.ch
If you already have an ePost business account, you can also log in via ePost and activate the “digital letterbox” and “scanning service” via the Widget Store.
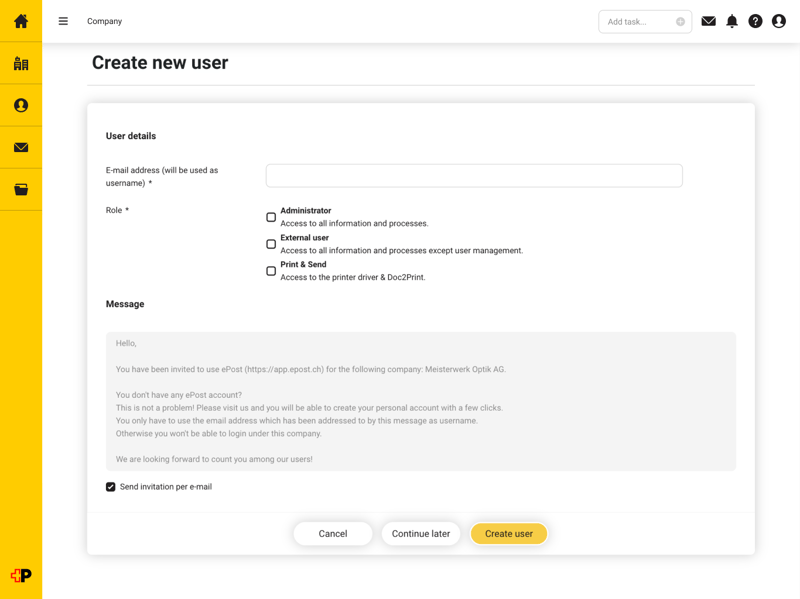
Step 5: Under the “User” menu, you have the option of adding further users and giving them permission to read and manage mail.
With the “ePost SmartSend” widget, you can send letters and invoices and reach your customers in the most popular channels: ePost app, eBill and physical letter.
Swiss Post takes care of all the processing and delivery of your items.
Step 1: Register company in ePost
Step 2: Verify company
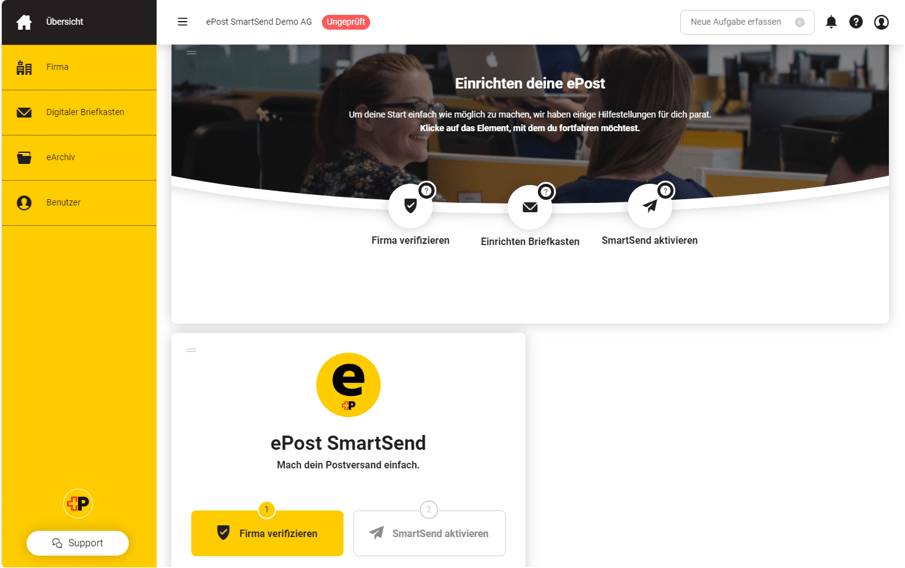
After successful login you will get to the overview page, from where you can directly access ePost SmartSend. If your company address has not yet been verified, you must first verify your address via the "Verify company" button.
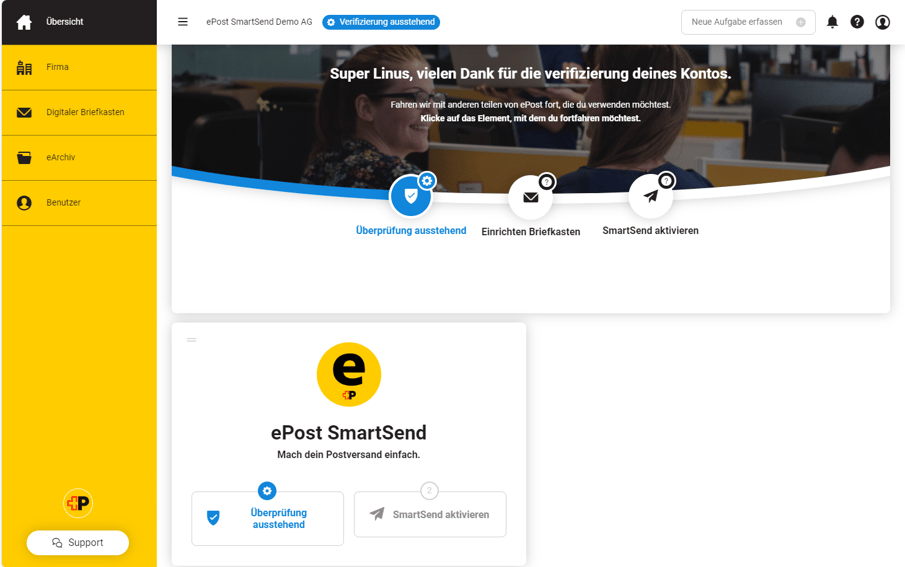
For verification of your company address, we will send you a physical letter with an activation code. Please note that it may take a few days for the code to reach you. As long as your address is not yet verified, you will see the status "Verification pending" on your overview page.
Once you have received the code by mail, log in to ePost again. Then click on the button "Verification pending" to get access to ePost SmartSend by entering the activation code.
Step 3: Activate the "ePost SmartSend" widget:
In order to use ePost SmartSend, you have to activate the corresponding widget once. To do this, click on the "Activate SmartSend" button.
You will now be redirected to the widget store and can subscribe to the ePost SmartSend widget for free. Once the widget is activated, the button "Open SmartSend" will appear on your overview page.
-2.png?width=905&height=644&name=MicrosoftTeams-image%20(2)-2.png)
You can now access ePost SmartSend at any time via this link.
Now you are ready to send your first letters and invoices via ePost SmartSend!
Step-by-step guide
Step 1: Create an order
Open SmartSend in your browser at smartsend.epost.ch and log in with your SwissID. Click on ‘New order’ in the SmartSend overview to start.
Tip: For recurring mailings, you can select an existing template under ‘Select template’ after your first mailing. This way, you can directly use the address position and postage from a previous order.
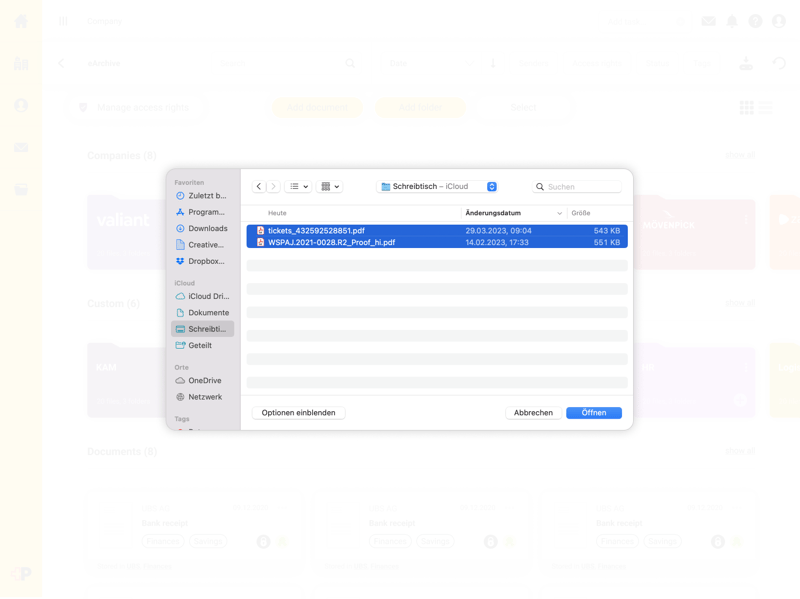
Step 2: Upload documents
Upload your main document as a PDF or ZIP file and give your order a name. If you upload a ZIP file, you can process several documents at once. If you want to include an attachment (e.g. a flyer) with your mailing, upload it separately under ‘Attachment’. Attachments do not require an address and are automatically attached to each mailing.
Important: The full recipient address must be included in the PDF and should always be in the same position, otherwise the order cannot be executed. SmartSend reads the address directly from your document. A maximum of 1'000 recipients can be processed per shipment.
Formatting requirements
- PDF documents in A4 format, portrait (210mm x 297mm)
- The font used must be embedded, otherwise SmartSend will replace it with a standard font
- Neatly formatted page margins
You can find further specifications in the SmartSend formatting requirements.
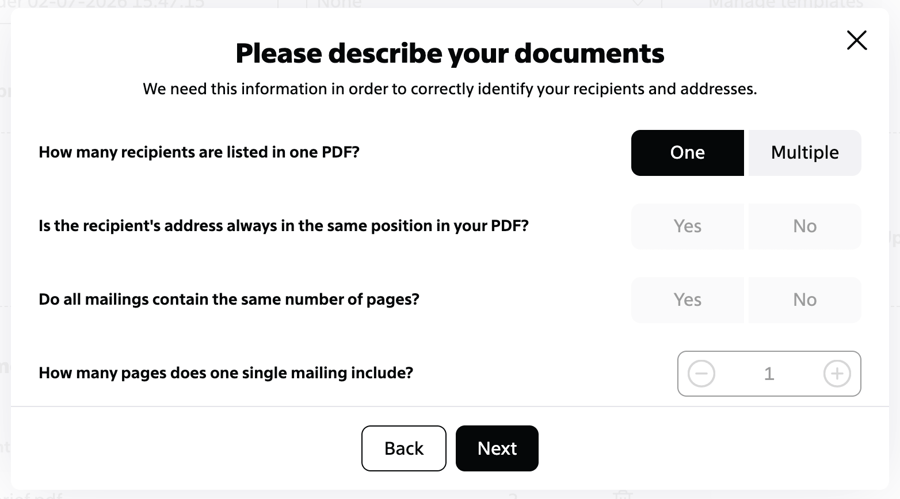
Step 3: Describe the document
To ensure that SmartSend correctly recognises the addresses, answer a few questions about your document:
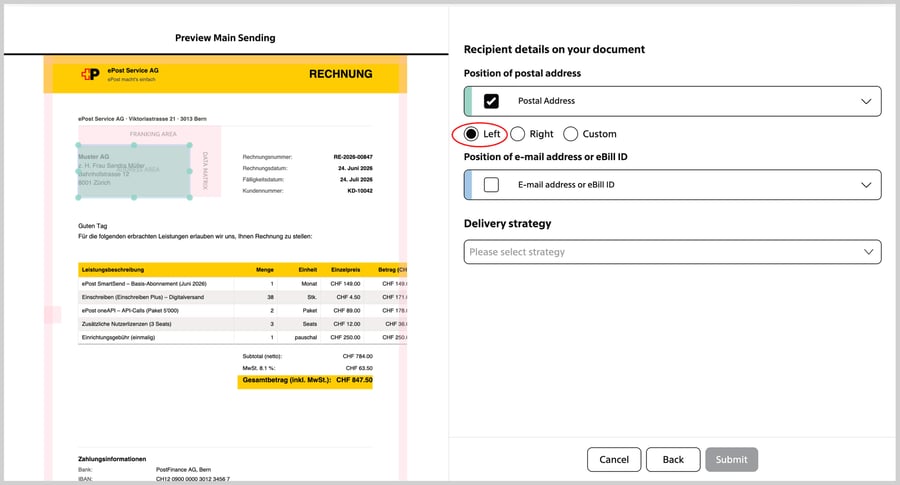
Step 4: Determine the address position
SmartSend will display a preview of your document. Select whether the address is left- or right-aligned. If the address is not located at either of the standard positions, you can manually move the marked area.
Important: If you specify a custom address position, SmartSend will automatically include an address cover sheet. This extra sheet will incur additional costs for postal delivery.
eBill (optional): If you are sending invoices via eBill, specify the position of the email address or eBill ID on your document here. Onboarding for eBill is required once. You can find more information at epost.ch/en/business-customers/ebill.
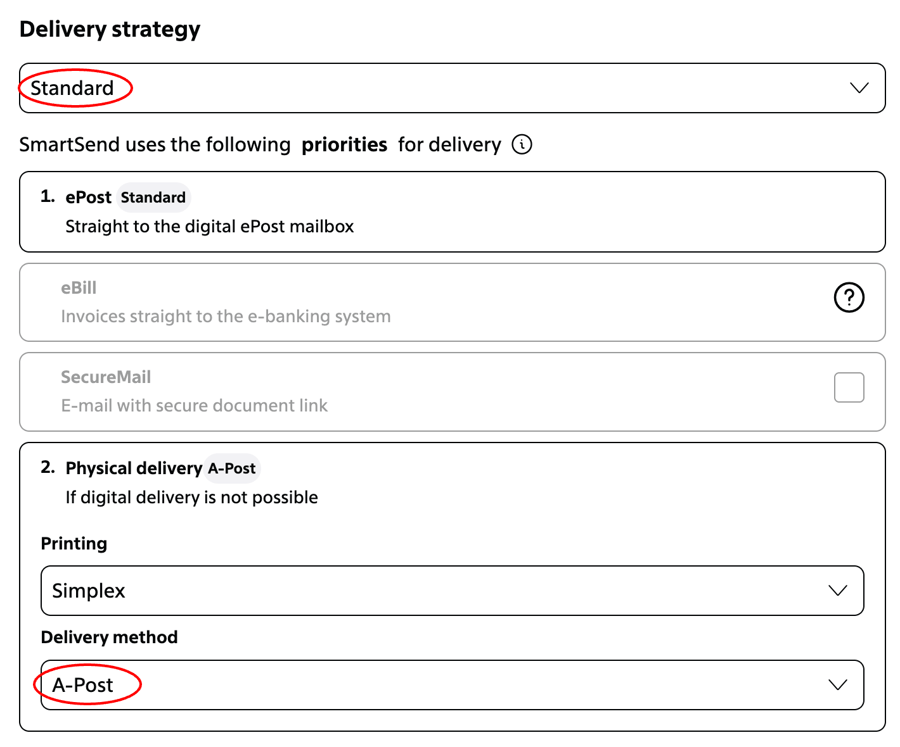
Step 5: Choose the delivery strategy
The delivery strategy determines how your mailings are delivered and what proof of delivery you receive. Select one of the three options for digital delivery:
-
Standard – Delivery confirmation: The document is delivered digitally and the delivery is confirmed.
-
Plus – Delivery confirmation and read receipt: The mailing is delivered digitally as A Mail Plus. In addition to the delivery confirmation, you will also receive a confirmation when the recipient opens the document – or a non-retrieval confirmation after 7 days.
-
Registered: The digital equivalent of a traditional registered letter. The recipient must actively accept or reject the document, including identification.
All options are documented with a qualified time stamp and seal according to ZertES, in addition to the delivery confirmation. Here you can find more information about the digital proof.
Step 6: Choose the physical fallback-option
If digital delivery is not possible, SmartSend automatically sends the document by post. Choose how you want these documents to be delivered:
Standard
-
A Mail: Delivery on the next business day
-
B Mail: Delivery within 3 business days
-
B Mail Bulk mailout: For sendings of 350 recipients or more
Plus
-
A Mail Plus: For time-critical mailings with tracking
Registered
-
Registered: With proof of receipt (also available as digital delivery from June 2026)
You can also choose between single-sided (simplex) and double-sided (duplex) printing. That’s all you need to do.
Step 7: Automatic address verification
Click on ‘Send’. SmartSend will submit your order and automatically check the recipients’ addresses in the background.
How automatic delivery works
SmartSend automatically checks which channel a recipient can be reached via and selects the optimal delivery method in the following order:
- ePost – Recipient uses ePost: The document is delivered digitally directly to the recipient’s ePost mailbox.
- eBill – No ePost, but an invoice with an eBill ID or an e-mail address: The document is delivered directly to the e-banking system (if eBill is activated).
- SecureMail – No ePost, no eBill, but an e-mail address is available: The recipient receives a link to the secure document via e-mail.
- Physical delivery – No digital channel available: The document is delivered by post.
Step 8: Finalise the order
Open the processed order in the SmartSend overview. You will see a list of all recipients with the address verification result, the assigned delivery channel and the number of pages. Check the list for completeness. Individual recipients can be removed if necessary. Click on ‘Confirm & Send’ to release the order.
If you do not release the order immediately, ePost will automatically remind you via e-mail after one day.
Tip: If the order is not immediately displayed in the SmartSend overview, refresh the page in your browser.
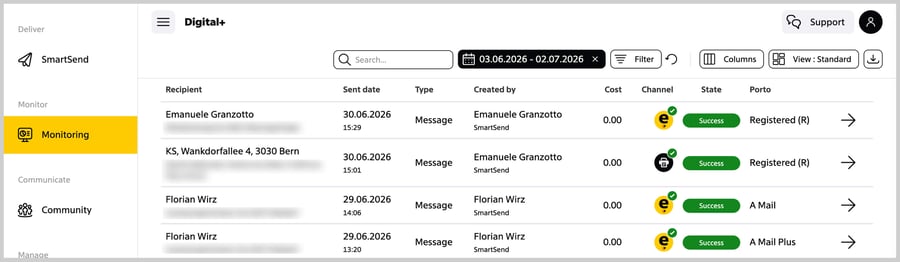
Step 9: Monitoring
For detailed tracking of your orders, go to ePost Monitoring via the page navigation or at https://client.epost.ch/en/monitoring. There you can see the status of each individual delivery, the delivery channel used and the costs incurred.
Note: If you do not release the order immediately, ePost will automatically remind you via e-mail after one day.
Step 4: With the upload function, you can upload locally saved documents as well as digital mail to your eArchive.